cooking

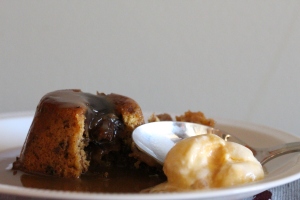
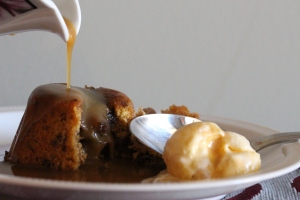
Sticky date pudding


Sticky date pudding

Are you looking for a no fail seductive dessert to tempt your loved one this Valentine’s Day?

This sticky date pudding is served with lashings of luscious and smooth caramel sauce.

The caramel sauce is so Moorish that you may want to make double and save some to serve with fruit and/or ice cream.

smothered in caramel sauceIngredients

250grams dates

1/2 tsp bicarbonate soda

60grams butter

1 cup brown sugar

2 eggs

1 1/2 cups SR flour

1/4 tsp vanilla extract

Sauce:

300ml thickened cream

1 cup brown sugar

30grams butter

getting eaten


Method:

1. Place dates in a medium saucepan, cover with hot water and bring to the boil. Pre heat oven to 180C.

2. In a medium mixing bowl, cream the butter and sugar until light and fluffy.

3. Add eggs and vanilla, mix until well combined, add flour.

4. Remove dates from heat, take out 6 softened dates and place aside, add bicarbonate of soda and mix well.

5. Chop the 6 dates in half and place in the bottom of a silicone muffin pan, greased dariole mould or muffin tin.

6. Mix the date and bicarbonate mix through the cake mix. Top muffin tray/moulds. Place into over and bake for 15minutes until firm to touch and golden.

the pour


7.  Whilst the muffins are in the oven, place all of the sauce ingredients into a small saucepan, bring to a simmer, maintain a simmer for 10minutes, the mixture should reduce slightly.

To serve: Invert each muffin, serve with lashings of hot caramel sauce and a side of cream or ice cream.

stickydate


These sticky date muffins and caramel sauce can be made ahead and reheated, a quick zap in the microwave for 30 seconds to warm through, the caramel sauce may take a minute or so.

Make 12 individual muffins, this mixture can easily be halved to make 6 or baked in a larger tin to make a cake / loaf.


Try following me on Facebook or Instagram for regular foodie updates ! Remember to pin your favorite recipes to your Pinterest account!

Warm quinoa salad with pumpkin and fetta cheese

Warm quinoa salad with pumpkin and fetta cheese

This delicious meal can be served as a side or as the meal itself, it’s very versatile it can be made the night ahead or served warm.


Quinoa is considered a superfood, why? It’s a source of complete protein, low GI and gluten free.


Don’t be afraid of cooking quinoa, it is much more friendly that rice to work with. It is readily available in supermarkets. Always give quinoa a good rinse before you use it.


This salad has the perfect balance of flavours, the nuttiness of the quinoa with the softness of the pumpkin, green beans for a little crunch, fetta cheese to add and element of sharpness to each bite and the parsley to clean the palate. This recipe is also super versatile you can add/subtract/interchange the veggies. This salad keeps well in the fridge, I usually double it and take it for lunches.

IMG_2563

Best part of all, it is all made in one saucepan!


Ingredients

2 cups quinoa

100gram pumpkin

1 cup green beans

70grams fetta cheese

2 stalks parsley

1 shallot

2Tb olive oil

1Tb lemon juice

IMG_2525

  1. Rinse quinoa, place into a medium sauce pan, cover with 3 cups water, chop the shallot and add to the quinoa, sprinkle with salt and pepper, on a medium heat bring the water to the boil.
  2. Simmer the quinoa with the lid for 5 minutes. Whilst the quinoa is cooking, chop the pumpkin into small cubes, add the pumpkin to the quinoa cook for 10minutes with the lid on. Whilst the pumpkin and quinoa mix is cooking, top and tail the green beans and chop the beans into 1.5cm pieces, add the green beans to the quinoa cook for 2minutes. Whilst the mix is cooking, chop the fetta into 1cm cubes, finely chop the parsley.
  3. At this point your quinoa should be slightly translucent and the water should have been evaporated (if you have extra water and the quinoa is done drain the excess water). Add the oil and lemon juice into the saucepan and toss.
  4. Place into a large serving bowl or individual plates, sprinkle with fetta and parsley.

IMG_2603


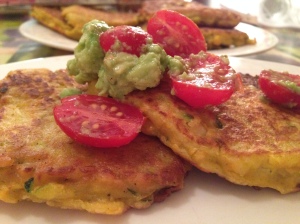
Corn fritters with smashed avocado and tomato salsa

Corn fritters with smashed avocado salsa


Corn fritters with smashed avocado and tomato salsa

These Moorish corn fritters are quick and easy to whip up, bringing a café style meal into your own home.

The mixture should be relatively thick. If you would like to make the meal a little more substantial you can whip up a salad and serve the corn fritters on a bed of salad.

Ingredients

2 small potatoes

1 carrot

2 medium zucchinis

125grams corn kernels

1 small onion

½ c SR flour

6 eggs

2Tb olive oil

Salt and pepper

1 avocado

200grams baby roma tomatoes

1tsp lemon juice

Method:

1. Peel the potatoes and the carrot, grate both vegetables using the smallest side of the grater place into a sieve and      allow the liquid to drain.

  1. Grate the zucchini and onion using the largest side of the grater place into the sieve, press down to remove the moisture. Into a bowl add the vegetables, corn kernels, flour, salt and pepper, mix well, add the eggs carrot and potato mix until well combined.
  2. Smashed avocado salsa: Run a knife around the avocado, split in half and remove the seed, scoop out the flesh mash with the back of spoon, slice tomatoes in half, add to a bowl, toss with lemon juice, 1Tb of olive oil sprinkle with salt and pepper.
  3. Heat ½ Tb of olive oil in a non stick fry pan on a medium heat, allow to heat up for a few minutes, dollop 1/3c of the mixture into the fry pan, cook for 4minutes each side or until golden brown. Once half of the mixture has been used, add the remaining oil to the fry pan and continuing with remaining mixture.

TO SERVE:

Place corn fritters onto a plate, place a dollop of the salsa on top, serve and enjoy

Light and fluffy carrot cake

Light and fluffy carrot cake

Traditionally carrot cakes are made with walnuts. This recipe uses finely ground macadamia nuts, I find macadamia nuts have a sweeter more delicate texture than walnuts do. The delicious sweet and nutty smell of this cake will waft through your kitchen, you may even find yourself staring at your oven door in anticipation of the cake being ready.

A trick I have learnt is to soak a thick tea towel in water and to tie it around the cake tin, be sure to make sure the end tuck in so no small pieces are sticking out. Why would I do that? I do that because it allows for an even penetration of heat, stopping the dreaded dome. I will try to photograph how it looks through the oven door during my next cake bake.

IMG_2089

Ingredients

200grams butter

1 cup brown sugar

3 eggs

1 1/3 cup plain flour

1 ½ tsp bicarbonate soda

1 ½ tsp baking powder

1 ½ tsp cinnamon

2 cups grated carrot

½ cup sultanas or currants (which ever you prefer)

1 cup whole macadamia nuts, coarsely chopped

Frosting

1 quantity of buttercream

Plus

½ lemon zested

2 TB cream cheese, at room temperature

½ cup whole macadamia nuts, coarsely chopped

Serves 10

  1. Pre heat oven to 180c. Line a medium spring for tin with baking paper and spray with oil.
  2. Separate eggs, place yolks aside in a small cup. Beat egg whites until stiff peaks form.
  3. In a separate bowl cream butter, sugar and vanilla until light and fluffy, add egg yolks lightly beat until combined. Add flour, cinnamon, baking powder, baking soda, carrot, currants and macadamia nuts, mix until well combined.
  4. Gently fold eggwhites into the cake mixture, do not over mix or the air you worked hard to incorporate will deflate.
  5. Pour mixture into cake tin. Bake for 35-40min or until skewer comes out clean.
  6. Prepare the frosting mixture whilst the cake is baking, to make the carrot cake variation, after step 1, add the cream cheese and lemon zest, beat until combined then add remaining ingredients. Set frosting aside until required. I find frosting easier to work with at room temperature.
  7. Allow cake to cool.IMG_2088
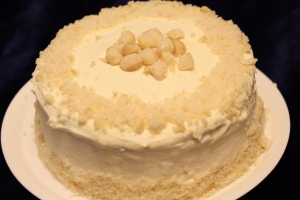
  8. Cover cake with a generous layer of icing. If need be one layer of icing can be placed onto the cake, then pop the cake into the fridge for 15minutes to harden the frosting and apply another layer. Using the back of a spoon, gently press coarsely chopped macadamias around the base of the cake and around the top edge of the cake, place remaining nuts into a peak in the middle.

IMG_2096


IMG_2105 Serve and enjoy

Slow cooked pork shoulder with braised fennel

Slow cooked pork shoulder with braised fennel

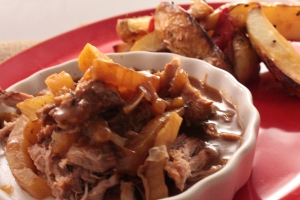
This delicious slow cooked pork recipe is slightly smokey with just a hit of sweetness. The onions and the fennel just about dissolve during the cooking process, if you do not like the taste of fennel your can omit it. This pork dish is really versatile can be served on slider buns, tortillas on a bed of mashed/roasted potato or polenta. I chose to serve the pork with roast potatoes with a sprinkle of rosemary and a capsicum.

pulled pork with roast vegetables

braised pork

INGREDIENTS
2 kg pork shoulder

2 red onions

1 fennel bulb

6 cloves garlic

600ml good quality vegetable stock

Salt and pepper

1T olive oil

1 tsp cumin

1 tsp garlic powder

1 tsp smoked paprika

1 tsp ground fennel

Serves: 6

IMG_0462

PREPARATION

  1. Pre heat oven to 110C.
  2. Rub cumin, fennel, garlic powder, paprika, salt and pepper all over the pork shoulder.
  3. Place 1tb oil into a oven proof dish with a lid (e.g cast iron pot), turn cook top onto a medium heat place dish on top and allow to heat up, add pork to pot and seal each side until lightly golden, sprinkle with brown sugar.
  4. Heat vegetable stock with garlic in the fry pan, pour over pork.
  5. Chop fennel into 1cm thick pieces, cut onions into small wedges and scatter around pork shoulder.
  6. Put lid onto dish and place into oven, cook for 6hrs.
  7. Remove pork from oven, remove any excess liquid, using a fork and tongs pull the pork.

TO SERVE

This pork can be served on slider buns, tortillas on a bed of mashed/roasted potato or polenta.

Braised pork with fennel

Honey Lemon Chicken

Honey lemon chicken Honey lemon chicken with a side of steamed greens

This dish is so quick and simple you will never get it from the take out store again. You can cut each piece of chicken into nugget sized pieces if you prefer. I serve this dish with a big bowl of steamed greens. You could easily serve this dish with a side of rice. The benefit of using cornflour is this dish is gluten free!

Honey lemon chicken

Serves 4

2 chicken breasts

1Tb Dry Sherry

2Tb soy sauce

½ tsp salt

2 eggs

Oil for frying

¼ cup cornstartch

½ tsp baking powder

Sauce:

1/3 cup white sugar

1/3 cup honey

2tb cornstartch

1 cup chicken stock

3tb lemon juice

1 tsp salt

1 lemon sliced

2tb vegetable oil

salt and pepper

Garnish: chopped shallots

Honey lemon chicken

Method:

  1. Slice chicken in half horizontally, so you will have 4 thin slices of chicken breast.
  2. In a large bowl combine the chicken, sherry, soy sauce and 1/2 teaspoon salt. Mix together, cover and refrigerate. Let marinate for 15 to 20 minutes.
  3. In a small bowl, beat together the eggs, 1/4 cup corn-starch and baking powder to form a batter.
  4. Remove chicken from marinade and sprinkle with salt and pepper.
  5. Place vegetable oil in fry pan on a medium heat
  6. Dip chicken in the batter to coat.
  7. Place chicken into fry pan and fry until golden brown and turn over and repeat for the other side, do this for each piece of chicken breast.
  8. In a medium bowl combine the sugar, honey, 1 tablespoon cornstarch, lemon juice and 1 pinch salt, mix together until their are no lumps add stock and lemon slices. In the fry pan that you cooked the chicken pieces in place lemon sauce, on a medium heat bring the sauce to a gentle simmer.
  9. Pour sauce over chicken, sprinkle with shallots and serve.Honey lemon chicken

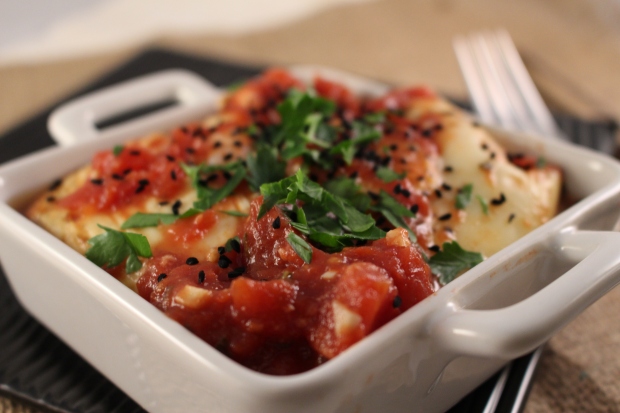
Shakshuka Baked eggs with tomato, parsley and feta

These Middle Eastern inspired baked eggs are super easy to make, loaded with flavour. The best part is they taste as good as they smell!
I have chosen to make these in a combination steam oven, which keeps my eggs nice and moist while cooking.
If you are cooking these in a conventional oven, cook at 180c with a lid on/covered in foil until eggs reach the desired consistency.
These recipe is super flexible, you can modify the recipe to meet your taste buds desires!
Middle eastern inspired baked eggs
INGREDIENTS
1 tablespoon butter
1 shallot
2 cans crushed tomato

Salt and pepper
8 eggs

2 sprigs parsley

100grams fetta cheese

¼ tsp sumac

To serve:

8 slices sourdough
1tsp nigella seeds

butter, for toast

1 tablespoon finely chopped parsley

½ lemon

40 grams butter

1tb olive oil
Serves: 4

Delicious baked eggs
METHOD:
1.Preheat combination oven to, 180c quarter steam and heat.
2.Finely slice shallot and parsley, cut lemon into wedges and crumble fetta cheese.
3.Grease 4 250ml ramekins (the wider lower rimmed ramekins work fantastically with this dish) generously with butter.
4. In a small fry pan, add the shallot, garlic and 1tb oil add tomatoes, bring to a simmer on a medium heat, sprinkle with salt and pepper and sumac, divide evenly amongst the dishes.
5.Break 2 eggs into each dish, pin prick each yolk, top with crumbled fetta a sprinkle of parsley and a pinch of salt and pepper.
6.Place ramekins onto a tray and into combination oven for 11 minutes, egg whites should be cooked through, but depending on preference egg yolks can be served runny or hard. Remove from oven. Sprinkle with a pinch of nigella seeds.
7. Turn combination oven to fan bake 200 ºC, place bread onto tray and gently warm through, for approximately 2 minutes.

Delicious baked eggs

TO SERVE

Serve with warm bread, a dollop of butter and lemon wedge

ALTERNATIVES

Baked eggs are delicious with a variety of flavours, try adding some chorizio or Spanish salami.

Tip: Eggs will not go rubbery in the steam oven.

Lemon coconut cake

Making a delicious cake requires just a pinch of patience. Creaming butter and sugar ensures that the sugar is distributed evenly in the butter it also allows air to be dispersed in the butter creating a light and even to rise cake, creaming is likely to take between 5-8minutes.   Adding lightly beaten egg eggs to the butter and sugar mixture and whipping for a minute on a low speed helps to incorporate air, creating a light and fluffy mixture.

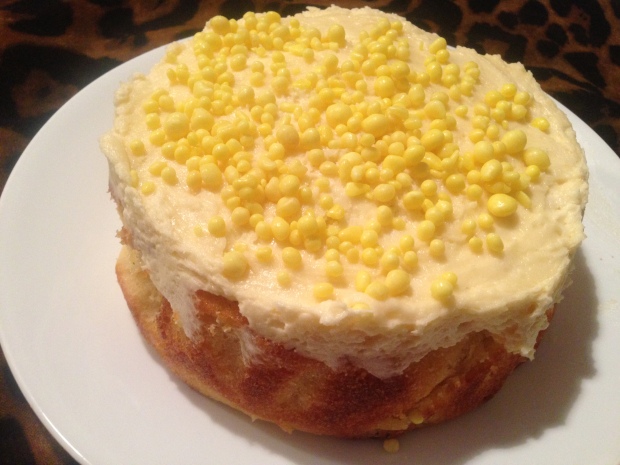
Lemon Coconut cake with popping candy

INGREDIENTS
125grams butter, at room temperature.

1 cup caster sugar

2 eggs

1 cup SR flour

1 cup shredded coconut

1/2Cup milk

1 tsp vanilla essence

1 quantity of butter cream

1 lemon zested and juice squeezed out
Serves                  10

Time                     60 minutes

Difficulty            medium

Type of dish      dessert

PREPARATION
1. Heat a fan forced oven to 160C. Line a small cake tin with baking paper.

  1. Beat butter and sugar until the mixture turns an off white colour.
  2. Add the eggs, ½ the lemon rind and vanilla beat until well combined.
  3. Mix the coconut and flour in a small bowl, using a spatula fold the dry mixture alternatively with the milk.
  4. Spoon the mixture into the lined pan, use the spatula to smooth over the surface.
  5. Bake for 55-60minutes, the cake should be golden and a skewer should come out clean.

Lemon Coconut cake with popping candy

TO SERVE

Create 1 quantity of butter cream, add the lemon juice and lemon rind. Sprinkle with yellow popping candy or any other sort of small/crushed candy

See the best ever butter cream frosting

IMG_6319-0.JPG

or

Dust with icing sugar and sprinkle with yellow popping candy or any other sort of small/crushed candy.

Or serve with a thick yoghurt

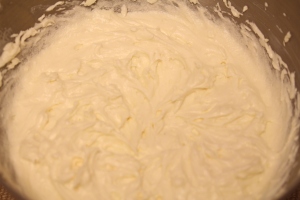
Best ever butter cream frosting

IMG_6318-0.JPG
The silly season is nearly upon us, an activity which I love doing is letting the kids decorate their own cupcakes. To do that you need the best buttercream frosting.

Give this one a try, a great topper on any cupcake or cake.

Pop bowls of lollies out and let kids creativity go wild, if you are sticking to a colour them tailor the lollies and frosting to suit !

IMG_6320-0.JPG
125grams softened butter
1 1/2 cups icing sugar
1tsp vanilla essence
1Tb thickened cream

Using an electric mixer, beat butter in a bowl until light and fluffy.
Add icing sugar mixture, cream, vanilla and flavourings (if desired), beating constantly until combined.

Flavouring ideas:
Strawberry: add 1tsp strawberry essence and a few drops of pink food colouring.

Lemon: add half a lemons zest a drop of yellow colouring and 2tsp of the lemon juice.

Chocolate: add 4TB cocoa powder

IMG_6323.JPG

IMG_6324.JPG

IMG_6325.JPG

IMG_6328.JPG

COMBINATION STEAM OVEN JAFFA BUTTERMILK CUPCAKES

JAFFA BUTTERMILK CUPCAKES


I find using Buttermilk keeps my muffins more moist and gives them a little extra tang. The buttermilk is a perfect, slightly acidic, addition to a citrus sweet.


Combination steam oven Jaffa cupcakes

Combination steam oven Jaffa cupcakes

375grams SR flour

165grams caster sugar

1 egg, whisked

1tsp vanilla essence

160grams butter, softened.

180ml Buttermilk

1TB orange zest

1TB orange juice

Ganache

250 grams dark chocolate melts

1/3 cup cream

  1. Heat combination steam oven to 200oC quarter steam and heat/ 25% humidity.
  2. Spray a muffin tin with cooking spray, I used silicone bakeware.
  3. Measure the buttermilk, and stand aside (this will prevent the butter hardening up later).
  4. Cream together, butter, sugar, vanilla and orange zest, add egg and orange juice and stir to combine, alternatively add flour and Buttermilk, mixture should appear slightly lumpy.
  5. Divide mixture evenly into 12 hole muffin tin and bake for 15minutes or until evenly browned.
  6. Whilst cooking prepare ganache, by heating cream and pouring over chocolate until chocolate has melted. If chocolate does not melt completely, oven a gentle heat or double boiler heat until melted.
  7. Once cupcakes are cool to touch, individually dip into ganache and sprinkle with orange zest.

Left over ganache keep well in the refrigerator, can be re-heated and tastes amazing on ice-cream !